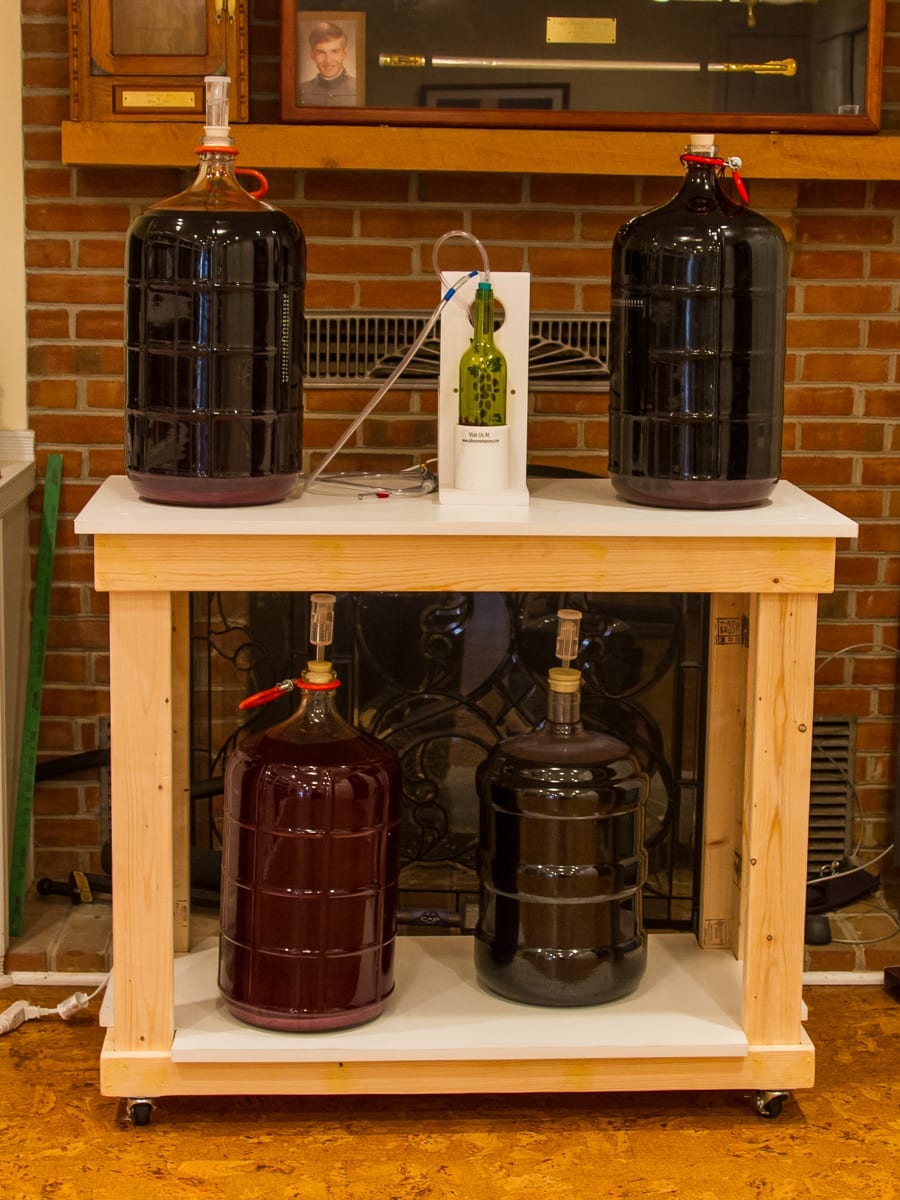
Ted (AZMDTed) from winemakingtalk.com made this Great roll around cart for winemaking for his Allinonewinepump for approx 70 dollars in total materials.
He built it so he will not have to lift heavy carboys as he places his empty carboy next to the one that needs to be transferred and he’s done in a short period of time. Other advantages of the cart –
*its mobile
*great for those who do not have a lot of room for wine making – great space saver
*same height as the counter top – so if you have to move a
carboy
*you can even bottle on the upper portion as long as you are
pulling from one of the lower carboys.
*very nice looking and highly functional
The cart is 37″ high, 21″ deep, and 45″ wide.
here is the material list –
2-2×4″ x 8′
2- 2×3″ x 8′
1- 1×8″ x 8′ pine
1- 1×4″ x 6′ pine
2- 3/4″x2’x4′ Melamine panels
4 wheels
More detailed instructions see below –
Wine Cart Assembly Instructions
- Cut the wood according to the cut list. Take care to ensure that the cross cut pieces are exactly the same length to each other. This will help ensure that when you assemble the box for the top and bottom supports that you will have it square and that the legs are all even.
- Assemble the top and bottom shelf supports per the drawing.
- Drill countersink holes for wood screws in the end pieces where they connect. Apply glue to the end pieces and screw together.
- Apply glue to the end of the cross bars in the middle and screw them in place from the front and back with 2 screws. The cross bars at the top are the 17 ½” pieces cut from the 2×4, and the cross bars for the bottom shelf support are 17 ½” pieces from the 2×3. The top support is made 3 ½” tall and the bottom is 2 ½”.
- Ensure that the shelf supports are square and set aside to dry.
- Assemble the legs
- Make each leg using one 2x4x34” and one 2x3x34”. The 2×4 sides will face the front and back of the cart to avoid showing the connecting edge. Drill a start hole in the top and bottom of the 2x4s and start either a 16 penny nail or 3” wood screw. Apply glue to the edge of the 2×3, align it flush with the edge of the 2×4 and then either screw or nail the two boards together. At this point you have an angle with one side the 2×4 and the other the 2×3, 34 inches long. Make four of these.
- Connect the legs to the shelf supports.
- Place the top support flat on a flat work surface. Countersink 2 holes in each corner where the legs will go. Apply glue to the end 3” of each leg and screw through the top support into the leg. Use two screws on each of the two sides at the corner. Glue and screw in all four legs. Make sure that the end of the legs are flush with the top shelf support.
- Place the bottom support on a flat work surface. Take the legs with the top shelf support attached and put the bottom of the legs into the bottom shelf support frame. Again countersink holes for the wood screws, then glue and screw in the legs to the bottom shelf support ensuring that end of the legs are flush with the bottom of the bottom shelf support.
- Turn the cart over and screw in the wheels with two holes in the wheel base attached to the 2×4 and 2 to the 1×3 face frame of the shelf support. I recommend that you get wheels rated at 125 lbs and that the front two have the locking mechanism to prevent the cart from moving.
- Put in bottom shelf
- Cut the bottom shelf (3/4” x 2’ x 4’ Melamine) to 45 inches long, and 23 inches wide. Note, this is wider than the cart I made but I think it’s an important improvement as it gives more shelf space to slide the carboy forward when using the AllinOneWine pump. The extra room will make inserting the racking cane easier.
- Place the bottom shelf on the top support bracket. Place it so that it is parallel to the front and sides, with 1” overhang at the back and the sides. This will create a 3” overhang in the front. Look under the shelf in this position and use a pencil to mark the location of the legs. Use these marks to cut out the shape of the legs from the corner. Cut about ¼” larger than the marks all the way around to make installation easier.
- One you’ve made the cut out you can apply Melamine edge banding to give the shelf a professional appearance.
- Place the shelf on the bottom shelf support and screw it into the shelf support. Take care to not sink the screw too deep. You want it flush but not breaking through the Melamine surface if you can. If you do break through just finish with a few drops of paint to seal the melamine back up.
- If you wish to add extra support to the front bottom shelf which will have a 3” overhang, then cut a 2×3 (or 1×3) to about 31 inches in length and screw it to the front center of the bottom support under the shelf. That should give you plenty of support when you slide a carboy forward.
- Put in the top shelf
- Cut the other piece of Melamine to 21” x 45”
- Apply Melamine edge banding if you wish.
- Center the top on the top shelf support with 1” overhang all the way around. Screw into the support frame.
- Enjoy some wine.
Here is a rough Diagram –
